
In our previous blog, we laid the groundwork for our MLOps environment by establishing a directory structure on PowerScale and configuring our ML-Lab access zone, along with Smart Connect. Now it’s time to take the next crucial step: connecting our PowerScale storage to our MLOps platform using Dell’s CSI (Container Storage Interface) driver and deploying ClearML server.
This integration is critical because it bridges the gap between enterprise-grade storage and modern MLOps workflows. By combining PowerScale’s robust storage capabilities with ClearML’s MLOps functionality through the CSI driver, we create a foundation that provides:
- Persistent storage for ML workloads
- Scalable data management for training datasets
- Secure access to model artifacts
- Enterprise-grade storage features for MLOps
In this guide, we’ll walk through three main components:
- PowerScale Preparation: Configuring the necessary user permissions and NFS settings
- CSI Driver Setup: Installing and configuring Dell’s CSI driver in our Rancher environment
- ClearML Deployment: Leveraging our storage configuration to deploy ClearML server

By the end of this guide, you’ll have a fully functional MLOps environment with enterprise storage integration, laying the foundation for our next blog, which will be the technicial configuration of the ClearML agents to leverage PowerScale directly.
TL;DR ? Check out the companion video 🙂
Prepare PowerScale Environment
Let’s begin with preparing our PowerScale environment and configuration of the Dell PowerScale CSI driver, facilitating a seamless deployment of ClearML on Rancher using Helm. We begin by preparing the PowerScale environment, enabling NFS shares, and setting up the CSI driver, enabling ClearML to leverage enterprise-grade storage efficiently.
Before deploying the CSI driver, you need to configure our PowerScale to support containerized workloads via NFS and set up a user that will have access to the cluster.
Step 1 – Create a dedicated group and user for CSI operations
Lets create a dedicated user “csmadmin” User and Group – certainly much easier to do this though the cli ! we’ll verify in the GUI afterwards.
This user will be used in our opaque secret named “isilon-creds” that we’ll be setting up later…

This first piece is certainly easier to do on the PowrScale CommandLine 🙂
isi auth roles create CSMAdminRole --description "Dell CSM Admin Role"  --zone System
isi auth roles modify CSMAdminRole --zone System --add-priv-read ISI_PRIV_LOGIN_PAPI --add-priv-read ISI_PRIV_IFS_RESTORE --add-priv-read ISI_PRIV_NS_IFS_ACCESS --add-priv-read ISI_PRIV_IFS_BACKUP
isi auth roles modify CSMAdminRole --zone System --add-priv-write ISI_PRIV_NFS --add-priv-write ISI_PRIV_QUOTA --add-priv-write ISI_PRIV_SNAPSHOT --add-priv-write ISI_PRIV_SYNCIQ
isi auth user create csmadmin --password "XXXXXX"
isi auth roles modify CSMAdminRole --add-user csmadmin
you should have a csmadmin user within our created csm_admin group

Step 2 – Enable NFS v4
- Log in to the PowerScale web UI.
- Navigate to Protocols > Unix Sharing (NFS) > Global Settings.
- Enable support for NFS v4 and click Save.

One last thing…..
In the previous blog we already set up our folder structure
/ifs/data/cls-01/                                # Cluster root
                └── ml-lab/                      # ML access zone root
                ├── artifacts/                   # Training outputs & metrics
                ├── datasets/                    # ML training data
                ├── logs/                        # System & application logs
                ├── models/                      # Trained models
                └── rke2-mlops/                  # Kubernetes PVC storage
Let change the ownership and permissions of of our rke2-mlops folder to the csmadmin
chown csmadmin: /ifs/data/cls-01/ml-lab/rke2-mlops
chmod 700 /ifs/data/cls-01/ml-lab/rke2-mlops
Now that I have everting setup on the PowerScale side do I need to export the rke2-mlop folder for our PVC’s ? – Actually, No. the CSI driver will create the directory and the exports for us, so were good to go.
Configure the Rancher Environment
Lets move onto configure a Project and a Namespace for our MLOps Environment. I created an mlops namespace – here is where we will deploy our “isilon” namespace for the CSI Driver and our ClearML Server Containers/Pods,

Step 1 – Create a Namespace for the CSI Driver:
- Log in to the Rancher UI and select your cluster.
- Under Projects/Namespaces, create a new namespace called
isilon.
Leave the defaults but make sure that the namespace is named correctly as ‘isilon’.

Step 2 – Create Opaque Secrets:
- Navigate to Storage > Secrets.
- Create two opaque secrets in the
isilonnamespace:- The first secret should be named
isilon-credsand should contain the credentials for the PowerScale cluster - In the data section, set the key to config and the values for our cluster are as follows – we’ll skip certificate checks for now….
- The first secret should be named
isilonClusters:
  - clusterName: "powerscale"
    username: "csmadmin"
    password: "XXXXXXX"
    endpoint: "powerscale.lab.local"
    isDefault: true
    skipCertificateValidation: true
    isiPath: "/ifs/data/cls-01/ml-lab/rke2-mlops/"
    isiVolumePathPermissions: "0770"

The second secret should be named isilon-certs-0. Set the key to cert-0 and provide an empty value i.e. “”

Step 3 – Install the CSI Driver
Next, we need to install the PowerScale CSI driver using Rancher:
Install via Helm Chart:
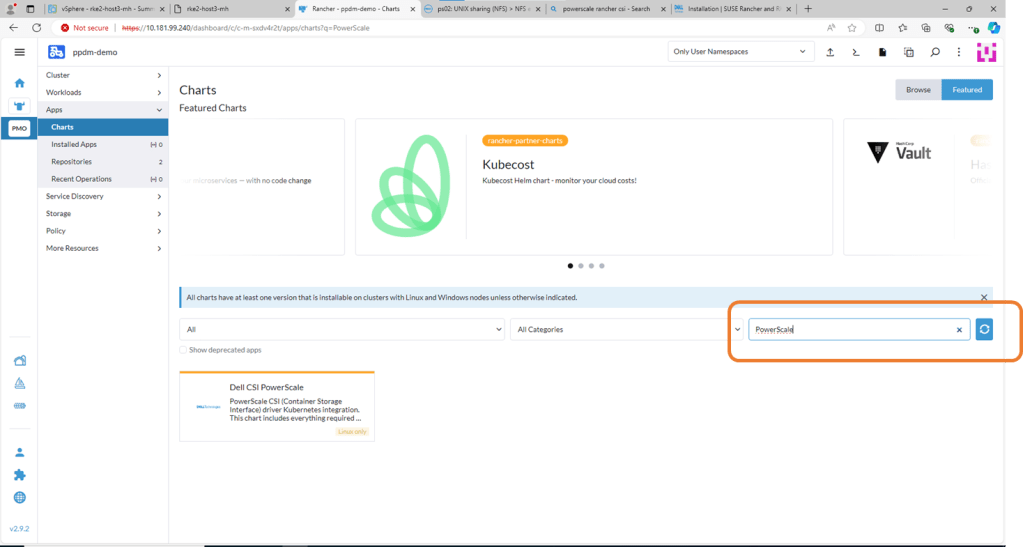
- Go to Apps > Charts in the Rancher UI.
- Search for CSI PowerScale, select the chart, and click Install.
Install Powerscale CSI using HELM Chart
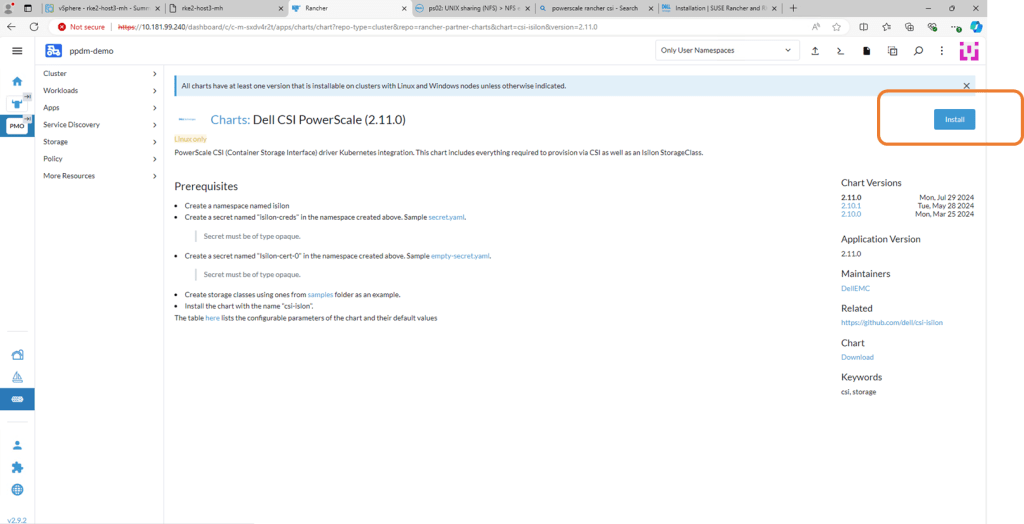
Navigate to Apps, then Charts and search for Powerscale. Click on Dell CSI for PowerScale.
- On the next screen, double check the prerequisites (which we have already done) and then click ‘Install’
Make sure both the namespace and name are set to isilon.
- Check the box for Customize Helm Options Before Install and click Next.
- If you want you can provide the ISI path “/ifs/data/cls-01/ml-lab/rke2-mlops/” in the YAML configuration (or leave as default) as we will be setting the correct path in the storage class later on.

During my initial deployment, I encountered an issue where the Elasticsearch pod failed to start due to a permissions error. Specifically, the error indicated that the container could not access the path.data directory (AccessDeniedException). This was caused by insufficient permissions to access the mounted volume.
To resolve this, I needed to update the CSI driver’s FSGroupPolicy setting. The default setting is ReadWriteOnceWithFSType, which was too restrictive for our setup with PowerScale. We changed it to FSGroupPolicy: File, which ensures that Kubernetes applies the appropriate permissions to all files in the volume, allowing Elasticsearch (and other pods) to access and write data without issues.
- Change fsGroupPolicy to File

Once the installation is complete, you should see all the CSI driver pods up and running.

Step 4 – Create a Storage Class:
Navigate to Storage > Storage Classes and import your storage class definition file. Make sure the storage class points to the PowerScale NFS export.
Create a Storage Class:
- Navigate to Storage > Storage Classes and import your storage class definition file. Make sure the storage class points to the PowerScale NFS export.
Navigate to the StorageClasses tab and click ‘Create’.

Now we could do this via Kubectl, or through the menu or in my case I’m just going to copy and paste my YAML file below.
Key Configuration Values in Your Storage Class
- Name and Default Class:
name: isilon: Specifies the name of the StorageClass. This identifies it within our Kubernetes cluster.storageclass.kubernetes.io/is-default-class: "true": Sets this StorageClass as the default, meaning all PersistentVolumeClaims (PVCs) that don’t specify a StorageClass will use this one. As this cluster is exclusing for ML-Ops Workloads and PowerScaleI have opted for this configuration.
- Provisioner:
provisioner: csi-isilon.dellemc.com: Indicates that the Dell EMC Isilon CSI driver will handle dynamic volume provisioning (which we set up earlier)
- Reclaim Policy:
reclaimPolicy: Delete: Ensures that volumes are automatically deleted when their associated PVCs are deleted, helping maintain storage hygiene.
- Volume Expansion:
allowVolumeExpansion: true: Enables you to resize volumes dynamically if the PVC requests more storage.
- Parameters:
AccessZone: ml-lab: Specifies our PowerScale Access Zone where volumes will be created. Theml-labzone is configured for ClearML workloads.IsiPath: /ifs/data/cls-01/ml-lab/rke2-mlops: Sets the base directory for volumes on the PowerScale cluster. This must pre-exist and be writable.AzServiceIP: ml-lab.lab.local: The service IP (DNS in our case) for the Access Zone. This allows the StorageClass to correctly route requests to the PowerScale cluster.RootClientEnabled: "false": Determines access behavior for Kubernetes nodes. With"false", nodes are added to the “Clients” field of the NFS export, providing limited permissions for improved security.ClusterName: powerscale: Matches the name of the cluster configuration stored in your CSI driver credentials secret, ensuring the correct cluster is targeted.
- Volume Binding Mode:
volumeBindingMode: Immediate: Specifies that volumes should be bound and provisioned as soon as a PVC is created, ensuring immediate availability.
apiVersion: storage.k8s.io/v1
kind: StorageClass
metadata:
  name: isilon
  annotations:
    storageclass.kubernetes.io/is-default-class: "true"
provisioner: csi-isilon.dellemc.com
reclaimPolicy: Delete
allowVolumeExpansion: true
parameters:
  AccessZone: ml-lab
  IsiPath: /ifs/data/cls-01/ml-lab/rke2-mlops
  AzServiceIP : ml-lab.lab.local
  RootClientEnabled: "false"
  ClusterName: powerscale
volumeBindingMode: Immediate


Deploy ClearML Server
Prepare Your Environment
Ensure Kubernetes Cluster is Ready:
- Verify that your Rancher-managed Kubernetes cluster is running and accessible.
- Confirm your Isilon StorageClass (
isilon) is active
kubectl get storageclass
NAME               PROVISIONER              RECLAIMPOLICY   VOLUMEBINDINGMODE   ALLOWVOLUMEEXPANSION   AGE
isilon (default)   csi-isilon.dellemc.com   Delete          Immediate           true                   9m14s
Create a namespace for the ClearML deployment:
root@ubuntu-client-ml-lab:/# kubectl create namespace clearml
namespace/clearml created
Deploy ClearML Server Components
ClearML Server consists of the following services:
- MongoDB (metadata storage)
- Elasticsearch (indexing and search)
- File Server (artifact storage) – More on this in our next blog 🙂
- API Server & Web App
Download ClearML Server Helm Chart:
Add the ClearML Helm repository:
helm repo add allegroai https://allegro.ai/helm-charts
helm repo update
Navigate to Apps -> Chart and search for ClearML – we want the clearml – MLOps platform – this is the ClearML Server Ops Platform

select install !

lets give it a name – and choose install – in our case there is no need to customize the helm chat as the default storage class that the helm chart will use will be the isilon storage class

after a few minutes (I believe it took 6 or 7 minutes) all pods should be deployed

Lets quick verify we can access the ClearML Server – We’ll just connect using “node port” for the moment (to verify) we’ll set up ingress in a later blog

Success! we can access ClearML Server

Next up: Part 3 – “Configuring ClearML Server and Agents to leverage PowerScale Directly:

Leave a comment